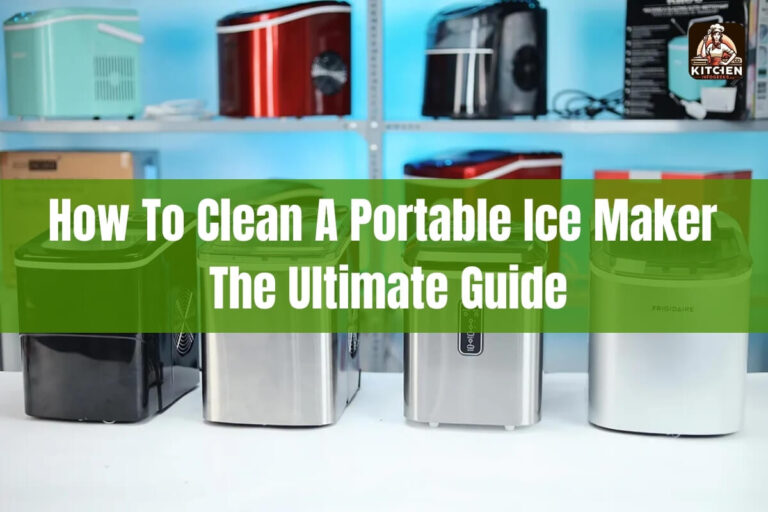
Are you looking for a step-by-step guide on how to clean an ice maker? You’re in the right place! Cleaning your ice maker regularly is crucial for maintaining the quality and safety of the ice it produces. In this detailed article, we’ll cover everything you need to know about cleaning different types of ice makers, including countertop models, built-in refrigerator ice makers, and standalone ice machines.
We’ll dive deep into the reasons why you should clean your ice maker, the recommended cleaning frequencies, and the supplies and tools you’ll need for the job. Plus, we’ll provide step-by-step instructions for cleaning each type of ice maker, as well as tips for maintaining a clean and well-functioning unit.
By the end of this guide, you’ll have a thorough understanding of how to keep your ice maker in top condition, ensuring fresh, clean ice for all your beverages.
Why Should You Clean Your Ice Maker?
Cleaning your ice maker is not just a matter of keeping it looking nice – it’s also essential for your health and the quality of the ice it produces. Here are a few compelling reasons why you should make cleaning your ice maker a priority:
Health Risks of Unclean Ice: Over time, ice makers can become breeding grounds for bacteria, mold, and even slime. These contaminants can find their way into the ice cubes, posing potential health risks if consumed.
Poor Ice Quality: Mineral buildup, stale water, and other residues can affect the taste, clarity, and consistency of the ice produced by an unclean ice maker. You may notice cloudy, soft, or off-tasting ice cubes.
Reduced Ice Production: As debris accumulates in the ice maker, it can impede the proper functioning of the unit, resulting in slower ice production or even a complete inability to make ice.
Potential Breakdowns: Neglecting to clean your ice maker can lead to costly repairs or even the need to replace the entire unit prematurely.
By keeping your ice maker clean, you’ll not only enjoy fresh, high-quality ice but also extend the life of your appliance and protect your family’s health.
How Often to Clean an Ice Maker?
The recommended frequency for cleaning your ice maker depends on several factors, including the type of ice maker you have and the quality of the water in your area.
Countertop Ice Makers: These compact units should be cleaned at least every three to six months, or more frequently if you notice signs of buildup or poor ice quality.
Built-in Refrigerator Ice Makers: It’s generally recommended to clean these ice makers twice a year, or more often if you live in an area with hard water or high humidity.
Standalone Ice Machines: These larger, commercial-grade units should be cleaned approximately every nine months, but the frequency may vary based on usage and water quality.
Regardless of the type of ice maker you have, it’s essential to keep an eye out for signs that it needs cleaning more frequently. These signs may include:
- Cloudy or discolored ice cubes
- Off-taste or odor in the ice
- Slow ice production
- Visible buildup or mold in the ice maker
If you notice any of these issues, it’s best to clean your ice maker promptly to prevent further problems.
Supplies and Tools Needed for Cleaning Ice Makers
Before you begin cleaning your ice maker, it’s essential to gather the necessary supplies and tools. Here’s a list of what you’ll need:
Cleaning Solutions:
- Vinegar (distilled white vinegar is recommended)
- Baking soda
- Commercial ice maker cleaning solution (optional, but recommended for tough buildup)
Tools and Supplies:
- Soft cloths or sponges
- Small brushes or toothbrushes (for hard-to-reach areas)
- Microfiber cloths (for exterior cleaning)
- Plastic or rubber scraper (for dislodging ice buildup)
- Bowls or containers (for mixing cleaning solutions)
- Gloves (optional, for protecting your hands)
Depending on the type of ice maker you have, you may need additional supplies or tools. Always consult your user manual for specific recommendations from the manufacturer.
Step-by-Step Guide to Cleaning a Countertop Ice Maker
Countertop ice makers are convenient and compact, but they require regular cleaning to maintain optimal performance and ice quality. Here’s a step-by-step guide to cleaning your countertop ice maker:
Step 1: Unplug and Drain the Unit
Before you begin cleaning, it’s essential to unplug your countertop ice maker from the power source. Then, locate the drain plug or cap (usually on the back or bottom of the unit) and remove it to allow the water to drain completely. Once the water has drained, replace the drain plug or cap.
Step 2: Remove and Clean Removable Parts
Most countertop ice makers have removable parts, such as the ice basket or scoop. Remove these parts and wash them thoroughly with warm, soapy water. Use a soft-bristled brush or sponge to remove any stubborn debris or buildup.
Step 3: Clean the Interior
Mix a cleaning solution of equal parts vinegar and water in a bowl or container. Dip a soft cloth or sponge into the solution and use it to wipe down the interior of the ice maker, including the walls, bottom, and underside of the lid.
For tough stains or buildup, you can use undiluted vinegar or a commercial ice maker cleaning solution. Apply the solution to the affected areas and let it sit for a few minutes before scrubbing with a soft-bristled brush or toothbrush.
Rinse the interior thoroughly with clean water to remove any remaining cleaning solution or debris.
Step 4: Clean Hard-to-Reach Areas
Use a small brush or toothbrush dipped in the cleaning solution to scrub hard-to-reach areas, such as the ice maker’s teeth or crevices. This will help dislodge any buildup or residue that may have accumulated in these tight spaces.
Step 5: Run a Cleaning Cycle
Once you’ve thoroughly cleaned the interior, fill the water reservoir with the vinegar or cleaning solution. Close the lid and run a cleaning cycle, allowing the solution to circulate through the ice maker.
Discard the first batch of ice produced after the cleaning cycle, as it may contain residual cleaning solution or debris.
Step 6: Clean the Exterior
Using a microfiber cloth dampened with the vinegar solution (or a mild dish soap and water mixture), wipe down the exterior of the countertop ice maker to remove any fingerprints, smudges, or dirt.
Step 7: Rinse and Dry
Rinse the interior of the ice maker with clean water to remove any remaining cleaning solution or residue. Dry the interior and exterior thoroughly with a clean, dry cloth.
By following these steps every three to six months, you’ll ensure that your countertop ice maker continues to produce fresh, clean ice for all your beverage needs.
How to Clean a Built-in Refrigerator Ice Maker?
Built-in refrigerator ice makers are convenient, but they can also be prone to buildup and contamination if not cleaned regularly. Here’s how to clean your built-in ice maker:
Step 1: Remove and Clean the Ice Bin
Start by removing the ice bin from your refrigerator. Consult your user manual for instructions on how to safely remove the bin, as the process can vary between models.
Once the bin is removed, discard any remaining ice and wash the bin with warm, soapy water. Use a soft-bristled brush or sponge to remove any stubborn debris or buildup.
Step 2: Clean the Ice Maker Interior
With the ice bin removed, you’ll have better access to the ice maker’s interior components. Mix a cleaning solution of equal parts vinegar and water in a bowl or container.
Dip a soft cloth or sponge into the solution and use it to wipe down the interior surfaces of the ice maker, including the walls, bottom, and underside of the lid.
For tough stains or buildup, you can use undiluted vinegar or a commercial ice maker cleaning solution. Apply the solution to the affected areas and let it sit for a few minutes before scrubbing with a soft-bristled brush or toothbrush.
Rinse the interior thoroughly with clean water to remove any remaining cleaning solution or debris.
Step 3: Clean the Dispenser Chute (if applicable)
If your refrigerator has an ice dispenser chute, it’s essential to clean it as well. Turn off the water supply to the ice maker and consult your user manual for instructions on how to properly access and disconnect the dispenser chute.
Once you have access to the chute, use a small funnel to pour a mixture of vinegar and water (or a commercial ice maker cleaning solution) into the chute. Let the solution sit for several minutes to help break down any buildup or residue.
Use a small brush or toothbrush to scrub the inside of the chute, dislodging any debris or mold that may have accumulated. Rinse the chute thoroughly with clean water before reconnecting it to the ice maker and turning the water supply back on.
Step 4: Replace the Water Filter (if applicable)
Many refrigerators with built-in ice makers have water filters that need to be replaced periodically. Cleaning your ice maker is an excellent time to replace the old filter with a new one.
Consult your user manual for instructions on how to locate and replace the water filter in your specific model. Replacing the filter will ensure that your ice maker is using clean, fresh water, which can improve the quality and taste of the ice it produces.
Step 5: Run Cleaning Cycles and Discard Initial Ice Batches
After you’ve thoroughly cleaned the ice maker and replaced any necessary components (like the water filter), it’s time to run a few cleaning cycles.
Plug your refrigerator back in and initiate the ice maker’s cleaning cycle (if it has one) or simply run a few regular ice-making cycles. Discard the ice produced during these initial cycles, as it may contain residual cleaning solution or debris.
Repeat this process until you’re confident that all traces of the cleaning solution have been flushed out of the system.
Step 6: Clean the Exterior
While you’re at it, take the time to wipe down the exterior of your refrigerator, especially the areas around the ice maker and dispenser. Use a microfiber cloth dampened with a mild dish soap and water solution or a vinegar and water mixture.
This will help remove any fingerprints, smudges, or dirt that may have accumulated on the exterior surfaces.
By following these steps twice a year (or more frequently, if needed), you’ll ensure that your built-in refrigerator ice maker continues to produce fresh, clean ice for your beverages.
Cleaning a Standalone Ice Machine
Standalone ice machines are often found in commercial settings or homes with high ice demand. These larger units require more frequent cleaning to maintain optimal performance and ice quality. Here’s how to clean a standalone ice machine:
Step 1: Turn Off and Drain the Unit
Before you begin cleaning, turn off the power to the ice machine and unplug it from the electrical outlet. Consult your user manual for instructions on how to properly drain the water from the machine.
In many cases, there will be a drain plug or cap that you can remove to allow the water to drain completely. Once the water has drained, replace the drain plug or cap.
Step 2: Remove and Clean Removable Parts
Most standalone ice machines have removable parts, such as the ice bin or basket, as well as other components like water filters or distribution tubes. Remove these parts and wash them thoroughly with warm, soapy water.
Use a soft-bristled brush or sponge to remove any stubborn debris or buildup. Rinse the parts thoroughly and set them aside to air dry.
Step 3: Clean the Interior with a Commercial Cleaning Solution
For standalone ice machines, it’s recommended to use a commercial ice maker cleaning solution specifically designed for these larger units. These solutions are formulated to effectively remove mineral buildup, scale, and other types of residue that can accumulate in the ice machine.
Follow the instructions on the cleaning solution bottle for proper mixing and application. In many cases, you’ll need to pour the solution into the water reservoir or distribution system and run a cleaning cycle to circulate the solution throughout the machine.
Step 4: Scrub and Rinse
Once the cleaning cycle has completed, use a soft-bristled brush or sponge to scrub the interior surfaces of the ice machine, dislodging any remaining debris or buildup.
Rinse the interior thoroughly with clean water to remove any traces of the cleaning solution.
Step 5: Run Cleaning Cycles and Discard Initial Ice Batches
After you’ve thoroughly cleaned the interior, run a few regular ice-making cycles to flush out any remaining cleaning solution or debris.
Discard the ice produced during these initial cycles, as it may contain residual cleaning solution or contaminants.
Step 6: Clean the Exterior
While the ice machine is disassembled, take the opportunity to wipe down the exterior surfaces with a mild dish soap and water solution or a vinegar and water mixture.
Use a microfiber cloth to remove any dirt, fingerprints, or smudges from the exterior of the machine.
By following this cleaning process every nine months (or more frequently, if needed), you’ll help ensure that your standalone ice machine continues to produce high-quality ice for your commercial or residential needs.
Tips for Maintaining a Clean Ice Maker
In addition to regular deep cleanings, there are several things you can do to help keep your ice maker cleaner for longer:
Use Filtered Water: Minerals and impurities in your water supply can contribute to buildup and scaling in your ice maker. Consider using a water filter or installing a whole-house filtration system to improve the quality of the water your ice maker uses.
Perform Regular Maintenance Cleaning: Even between deep cleanings, it’s a good idea to perform regular maintenance cleaning on your ice maker. This can involve wiping down the interior with a vinegar solution or running a cleaning cycle more frequently than the recommended deep cleaning schedule.
Check for Signs of Buildup or Mold: Don’t wait until your ice maker is visibly dirty or producing poor-quality ice to clean it. Periodically inspect the interior for signs of buildup, mold, or other contaminants, and clean the unit if necessary.
Replace Water Filters as Recommended: If your ice maker or refrigerator has a water filter, be sure to replace it according to the manufacturer’s recommendations. A clogged or expired water filter can contribute to poor ice quality and other issues.
By following these tips and maintaining a regular cleaning schedule, you’ll help ensure that your ice maker continues to produce fresh, clean ice for years to come.
Frequently Asked Questions about Cleaning Ice Makers
Can I use vinegar instead of commercial cleaners?
Yes, vinegar is an excellent and affordable alternative to commercial ice maker cleaning solutions. A mixture of equal parts vinegar and water can effectively remove buildup, mineral deposits, and other residues from your ice maker.
However, for particularly stubborn buildup or larger standalone ice machines, a commercial cleaning solution may be more effective.
How do I clean a moldy ice maker?
If you notice mold growth in your ice maker, it’s important to address the issue promptly. Start by discarding any remaining ice and thoroughly cleaning the interior with a vinegar solution or a commercial cleaning product designed to kill mold and mildew.
For severe mold growth, you may need to disassemble the ice maker and soak the removable parts in a vinegar or bleach solution to eliminate the mold completely.
What if my ice still tastes off after cleaning?
If your ice still has an off-taste or odor after cleaning, there may be residual buildup or contamination that wasn’t fully removed during the cleaning process.
Try running a few more cleaning cycles or using a stronger cleaning solution, such as undiluted vinegar or a commercial cleaner specifically designed for tough ice machine buildup.
You may also want to replace the water filter (if applicable) and consider using a water filtration system to improve the quality of the water your ice maker uses.
How can I prevent buildup and keep my ice maker cleaner longer?
To help prevent buildup and keep your ice maker cleaner for longer periods, consider the following tips:
- Use filtered or purified water in your ice maker to reduce mineral content.
- Regularly clean and descale your ice maker according to the recommended schedule.
- Discard any unused ice that has been sitting in the bin for an extended period.
- Wipe down the interior of the ice maker with a vinegar solution between deep cleanings.
- Replace the water filter as recommended by the manufacturer.
By taking these preventive measures, you can help minimize the buildup of residue and contaminants, ensuring that your ice maker continues to produce fresh, clean ice for your beverages.
Final Thoughts
Cleaning your ice maker may seem like a tedious task, but it’s essential for maintaining the quality and safety of the ice you consume. By following the step-by-step guides and tips outlined in this comprehensive article, you’ll be well-equipped to clean any type of ice maker.


